Welcome to Club Ceramic Cambridge — your trusted partner for complete premium flooring options in Cambridge, Kitchener, Waterloo, Guelph, and surrounding areas.
Proper subfloor ventilation is one of those home maintenance issues that most homeowners don’t think about—until they discover mold, musty odors, or structural damage caused by excessive moisture.
If your home has a crawl space or raised foundation, understanding Ontario’s unique climate challenges and ventilation requirements can save you thousands in repairs down the road.
Working on a new home project? Call now for a free estimate: (647) 394-6030
Ontario’s climate presents specific challenges for subfloor spaces. Our cold winters, wet springs, and humid summers create the perfect conditions for moisture accumulation beneath homes. Without adequate ventilation, this moisture leads to:
The goal of subfloor ventilation is simple: keep air moving through the crawl space to prevent moisture buildup and maintain a dry, healthy environment beneath your home.
The Ontario Building Code (OBC) specifies minimum ventilation requirements for crawl spaces and subfloor areas. While specific requirements can vary based on your municipality and whether you’re building new construction or renovating an existing home, general guidelines include:
Ventilation Opening Size: The total net area of ventilation openings should be at least 1/150th of the crawl space floor area. For example, a 1,000 square foot crawl space requires approximately 6.67 square feet of ventilation openings.
Vent Placement: Vents should be distributed around the perimeter of the foundation to promote cross-ventilation. Ideally, you want opposing vents on different sides of the house to encourage airflow through the entire space.
Ground Cover: The OBC typically requires a ground cover (usually 6-mil polyethylene vapor barrier) over exposed earth in crawl spaces, which significantly reduces moisture evaporation into the subfloor area.
Minimum Opening Height: Ventilation openings should be positioned to prevent snow accumulation from blocking them during winter months.
It’s worth noting that code requirements represent minimum standards. In many situations—particularly in older homes or those with known moisture issues—exceeding these minimums provides better protection.


Before making improvements, evaluate your existing subfloor ventilation situation. Here’s what to look for:
Check Air Gaps: Walk around your home’s perimeter and examine the gap between your foundation and the lowest siding or weatherboard. Even small gaps (2-3 inches) can provide ventilation, but consistency matters. If mulch, soil, or landscaping has built up against your house over the years, these gaps may be partially or completely blocked.
One homeowner discovered that the previous owner had spread mulch around the house sides, completely blocking subfloor ventilation. The building inspector recommended immediate removal to prevent moisture and termite issues. After clearing the mulch, they found the air gap between the weatherboard and dirt was extremely tight—sometimes less than an inch—raising concerns about adequate airflow.
Inspect Existing Vents: Older homes often have small terracotta or brick vents with tiny openings that provide minimal airflow. Modern galvanized or bronze mesh vents offer significantly more open area while still keeping pests out.
Look for Moisture Signs: Access your crawl space (if possible) and look for:
Consider Your Property’s Topography: Homes built on slopes or in low-lying areas face greater moisture challenges. If your property sits lower than neighboring properties, you may receive groundwater runoff, making robust ventilation even more critical.
Blocked or Inadequate Vents: Many older Ontario homes were built with minimal ventilation that doesn’t meet current understanding of moisture control. Additionally, landscaping changes over decades often bury or block existing vents.
Condensation from Cold Weather: During Ontario’s harsh winters, condensation can form on anything that penetrates to the exterior—bath fan vents, hose bibs, or pipes running through floor joists. When temperatures drop to -30°C for extended periods, this condensation can drip onto the subfloor, creating mysterious puddles that homeowners struggle to trace.
One Calgary homeowner (facing similar climate challenges) noticed a small puddle of water near their basement wall during a three-week cold snap. They couldn’t trace it to any obvious leak, as there was no standing water during spring melt or heavy rain. The likely culprit? Condensation forming on cold pipes and dripping down—a common issue in extreme cold.
Poor Cross-Ventilation: Vents concentrated on one or two sides of the house don’t create adequate airflow. You need opposing vents to establish cross-ventilation patterns.
Water Intrusion from Grading Issues: If soil around your foundation slopes toward your house instead of away, water naturally flows toward and potentially under your home. No amount of ventilation can overcome active water intrusion—the grading must be corrected first.
Houses Built on Rock or Poor-Draining Soil: Homes built atop bedrock, clay, or sandstone can experience perpetual moisture issues as groundwater follows natural drainage patterns directly under the house. One Australian homeowner discovered their house sat atop a sandstone bed, with water from uphill properties tracking along the rock layer into their subfloor. Ventilation helps, but in extreme cases, vapor barriers become essential.
If your assessment reveals inadequate ventilation, here are proven solutions:
Upgrade Old Vents: Replace small terracotta or brick vents with larger galvanized mesh or bronze vents. These modern alternatives provide 3-5 times more open area while preventing pest entry. The installation process involves:
Some homeowners drill large holes (approximately 100mm diameter) through foundation bricks and mount decorative vents over them—an easier approach than removing entire bricks.
Add More Vents: If your home has insufficient total ventilation area, adding vents is the most direct solution. Aim for balanced placement—if you add a vent on the north side, add corresponding vents on the south side to promote airflow.
Remove Internal Obstructions: Interior foundation walls in crawl spaces may have old vents with tiny openings. Knocking these out entirely (assuming they’re not load-bearing) improves direct airflow between different sections of your subfloor.
Address Landscaping and Grading:
Install Mesh Screens: Once you’ve opened up ventilation, protect against unwanted visitors. Hardware cloth or specialized foundation vent screens keep out mice, rats, snakes, and insects while allowing airflow.
Sometimes passive ventilation simply can’t overcome moisture issues, particularly in:
In these situations, mechanical ventilation provides the solution.
Subfloor Ventilation Fans: These specialized fans actively move air through your crawl space, creating consistent airflow regardless of wind conditions. Effective systems include:
One homeowner initially tried upgrading their terracotta vents to galvanized alternatives, but when that didn’t solve their moisture issues, they installed ducted inline fans with 6-inch ducting. The dramatic improvement convinced them that active ventilation was necessary for their situation.
Smart Controls: Modern ventilation systems can include:
The consensus among renovation professionals is clear: if you’re facing ongoing moisture issues, don’t wait to try natural ventilation improvements first—just install fans. The cost is minimal (typically $100-300 for a basic setup), the installation is straightforward for anyone with basic DIY skills, and the effectiveness far exceeds passive vents alone.
Before worrying about ventilation, ensure you have proper ground cover in your crawl space. A 6-mil polyethylene vapor barrier laid over exposed earth dramatically reduces moisture evaporation into the subfloor area.
Installation Tips:
One homeowner dealing with water tracking along a sandstone bed under their house found that laying plastic had a far greater impact than any ventilation improvements. The vapor barrier contained the perpetual underground moisture, allowing it to continue flowing downhill without creating a swamp in the crawl space.
Many Ontario homes have partially or fully finished basements rather than traditional crawl spaces. These present unique ventilation challenges:
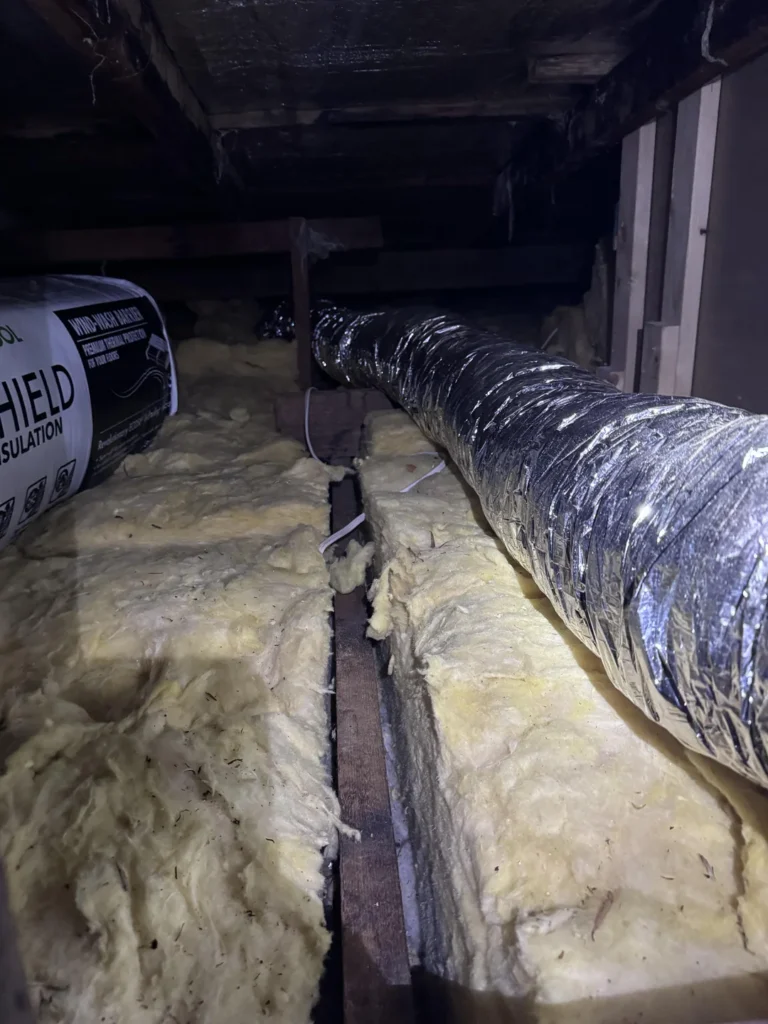
Subfloor Systems in Basements: If you’re finishing a basement, consider installing a raised subfloor system like DMX Airflow or similar products. These systems create an air gap between the concrete slab and your finished floor, providing:
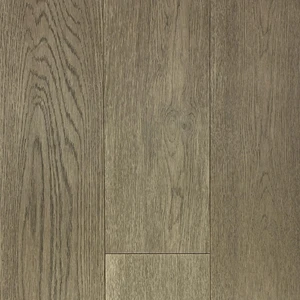
Several homeowners report that DMX Airflow with luxury vinyl tile (LVT) on top keeps their feet comfortable even during harsh Canadian winters. At most, the floor feels slightly cool, easily remedied with socks or area rugs.
Addressing Basement Moisture Before Finishing: Never finish a basement with active moisture problems. If you notice leaking, even minor puddles during extreme cold or spring melt, address the root cause first:
One homeowner faced pressure to finish their basement immediately but wisely chose to spend one more winter monitoring moisture after making exterior improvements (extending eavestroughs, improving grading, adding drainage rock). This patience could save them from having to tear out carpet and replace flooring due to hidden water damage.
The Subfloor vs. Waterproofing Debate: A $1,700 raised subfloor system is not a solution for leaking basements. While it provides some protection (allowing water to drain rather than soaking into carpet), it’s a band-aid on a bigger problem. Fix leaks first, then add subfloor for comfort and performance benefits—not as a waterproofing measure.
Many ventilation improvements are DIY-friendly:
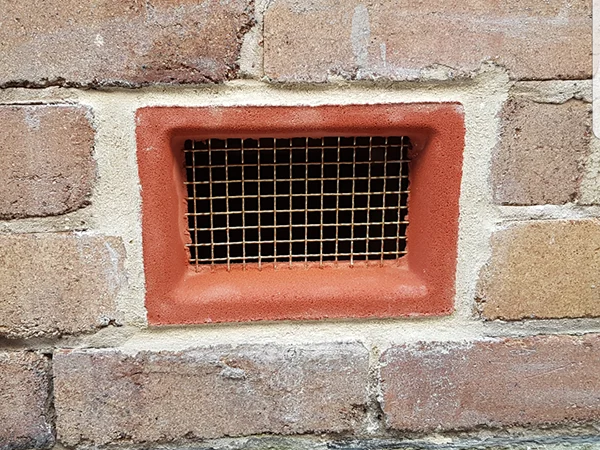
However, consider professional help for:
A qualified home inspector or foundation specialist can provide invaluable assessment, particularly if you’re dealing with ongoing moisture problems despite your best efforts.
After making ventilation improvements, monitor their effectiveness:
Install Humidity Sensors: Inexpensive smart humidity sensors (available for $20-40) placed in your crawl space provide real-time data on moisture levels. Ideal crawl space humidity should stay below 60%, preferably in the 40-50% range.
Visual Inspections: Check your crawl space or basement quarterly:
Document Changes: Take photos before and after ventilation improvements. This documentation helps you assess effectiveness and provides valuable information if you need to consult with professionals later.
Subfloor ventilation isn’t a set-it-and-forget-it solution:
Your home is likely your largest investment, and the foundation supporting it deserves attention. Proper subfloor ventilation protects structural integrity, maintains healthy indoor air quality, and prevents costly repairs down the road.
For Ontario homeowners, the combination of our challenging climate and aging housing stock makes ventilation vigilance particularly important. Whether you’re dealing with a historic home requiring vent upgrades, a new build where you want to ensure proper installation, or an existing home showing moisture warning signs, taking action now prevents problems later.
Start with assessment: check your current ventilation, look for moisture indicators, and evaluate your property’s drainage. Address grading and waterproofing issues first, then improve ventilation through better vents, additional openings, or mechanical fans as needed. Don’t forget vapor barriers—they’re often the single most effective moisture control measure.
With proper attention to subfloor ventilation, your Ontario home will maintain its structural integrity and comfort for decades to come.
Need expert advice on your specific situation? Contact Club Ceramic Cambridge for professional assessment and solutions tailored to your home’s unique needs. Our team understands Ontario’s climate challenges and can recommend the right approach for your property.