• Phone
  • Mail
× Send

CLICK VINYL FLOORING: PROS, CONS & WHAT TO KNOW BEFORE INSTALLING

Welcome to Club Ceramic Cambridge — your trusted partner for complete premium flooring options in Cambridge, Kitchener, Waterloo, Guelph, and surrounding areas.

If you’re considering new flooring for your home, you’ve likely encountered click vinyl flooring—also known as click-lock vinyl or floating vinyl plank. It’s heavily marketed as the ultimate DIY-friendly flooring solution: no glue, no nails, just click the planks together and you’re done. But is it really that simple? And more importantly, does it hold up over time?

Before you invest in click vinyl flooring, it’s crucial to understand both its advantages and its potential pitfalls. This guide combines insights from professional installers, long-term homeowners, and real-world experiences to give you the complete picture.

Working on a new home project? Call now for a free estimate: (647) 394-6030

Visit Our Showroom

What Is Click Vinyl Flooring?

Click vinyl flooring is a type of luxury vinyl plank (LVP) or luxury vinyl tile (LVT) that uses an interlocking mechanism instead of adhesive. The planks or tiles feature tongue-and-groove edges that snap together, creating a “floating floor” that sits on top of your subfloor without being permanently attached.

This floating installation method differs significantly from traditional glue-down vinyl, which is adhered directly to the subfloor with adhesive. The click system’s main appeal is its accessibility to DIY installers and the perceived ease of installation.

The Appeal: Why Click Vinyl Seems Perfect

DIY-Friendly Installation: Unlike tile or glue-down vinyl, click flooring doesn’t require special adhesives, trowels, or waiting for materials to cure. Many homeowners with zero flooring experience have successfully installed it themselves.

Speed: Installation can happen quickly. One homeowner reported installing click vinyl planks in their bedroom in just one day—a timeline that would be impossible with ceramic tile or traditional hardwood.

No Commitment Anxiety: Because it’s not glued down, there’s a perception that mistakes can be easily corrected or the floor can be removed if needed.

Cost-Effective: Click vinyl typically costs less than hardwood or tile, both in materials and installation. Mid-range options run between $2.50 to $4 per square foot.

Comfortable Underfoot: Unlike ceramic tile, vinyl feels warmer and softer when walking barefoot—a significant advantage in bedrooms, living areas, and homes in colder climates.

Waterproof Performance: Quality vinyl is genuinely waterproof, making it appealing for kitchens, bathrooms, and basements where moisture is a concern.

Adam Peerson profile pictureAdam Peerson
19:59 24 Oct 25
Great customer service and wide selection on luxury vinyl flooring and tiles, definitely will recommend and come back for all my future purchases.
marcel hadid profile picturemarcel hadid
23:56 22 Oct 25
Great tile shop! Has a huge variety of tiles to pick from. The owner was great, and gave a lot of guidance along the way.
Abbas Ali profile pictureAbbas Ali
18:26 08 Oct 25
Very happy with club ceramic in Cambridge the kitchen backsplash tiles were installed beautifully
Ahmad Raza profile pictureAhmad Raza
18:41 30 Sep 25
They Add elegance to my bathroom and the installation service was quick smooth and So Professional
namra shah profile picturenamra shah
23:32 05 Sep 25
Best flooring store in Cambridge
Darren Brogreen profile pictureDarren Brogreen
12:52 31 Aug 25
Hadid and Antonio made the purchase and process flawless! Best price and great selection! Devroe and his crew were great on the install! Could not be happier with them all!
John Wang profile pictureJohn Wang
01:18 14 Aug 25
We were looking for ceramic tiles from a few places, and saw a specific type that worked out very well for the bath. Everyone in the store was helpful, and the pricing is very competitive. Will definitely recommend.
Photo from customer reviewPhoto from customer review
Herry Đặng profile pictureHerry Đặng
18:03 21 Jul 25
Good service and price. U will be surprised. Come and experience it.
Oreoluwa O. Olawunmi profile pictureOreoluwa O. Olawunmi
19:00 15 Jul 25
Doing some renovations for the summer and they were really helpful with suggestions on the best items for my reno project.

Quality products with amazing and super helpful staff, I’ll definitely recommend!
Mark Town profile pictureMark Town
17:26 10 Jul 25
We were impressed with the tile selection and found exactly what we were looking for. Ghadi laid out various tiles on their showroom floor to help with our selection. Our order came in sooner than we expected, which was very appreciated and helped allay some of our pre-renovation anxiety.

The Reality: What Actually Happens Over Time

While click vinyl flooring works beautifully in some installations, real-world experiences reveal significant issues that manufacturers and retailers rarely discuss upfront.

The Gapping and Swelling Problem

Multiple homeowners report the same frustrating issue: after installation, their click vinyl develops gaps between planks or experiences swelling at the edges. One homeowner described their floor suffering from “terrible gapping and swelling” despite professional installation. Another compared their floor’s expansion and contraction to “a GCSE geography lesson in plate tectonics, with ridges and trenches” that made the surface quite uneven.

These problems stem from vinyl’s fundamental nature as a plastic product. It expands when warm and contracts when cold. In a glued-down system, the adhesive restricts this movement. In a floating click system, the entire floor moves as one unit—and if it can’t move freely due to improper installation or inadequate expansion gaps, you get buckling, gapping, or edge lifting.

Underfloor Heating Incompatibility

If you have radiant underfloor heating or plan to install it, proceed with extreme caution. The constant temperature fluctuations cause significant expansion and contraction in click vinyl flooring. One homeowner with underfloor heating reported that even after just nine months, they wouldn’t install click vinyl again given the choice. The continuous movement created an uneven surface that detracted from the otherwise attractive appearance.

While some manufacturers rate their products for use with radiant heat, the real-world results often disappoint. If underfloor heating is non-negotiable for you, strongly consider glue-down vinyl or alternative flooring materials entirely.

Pattern Repetition Becomes Obvious

Cheaper click vinyl products use limited pattern variations, meaning the same wood grain or tile pattern repeats every few planks. In small rooms, this might go unnoticed. In larger, open-concept spaces, the repetition becomes glaringly obvious and screams “fake.”

One homeowner noted that even with otherwise great-looking flooring, the pattern repetition was noticeable in their large floor area. Higher-end products offer more pattern variations, but they come at a premium price that begins to approach the cost of real hardwood or quality tile.

The Removal Myth

Here’s something few retailers mention: click vinyl flooring is marketed as easy to install and remove, but the reality is quite different. One installer bluntly stated, “Just because it clicks together doesn’t mean it’s easy to take back up again.”

The issue lies in the locking mechanism. While you can theoretically disassemble a click floor, the long edges are reusable but the short edges are not. Once you tap the short end of a plank into the previous plank, attempting to separate them will destroy both pieces. If you need to replace planks in the middle of a room, you often have to disassemble everything from the nearest wall—a massive undertaking.

Professional Installer Resistance

Perhaps most telling is this: some professional flooring companies refuse to install click vinyl systems. One experienced floor layer explained that their company won’t do click LVT, instead recommending glue-down systems exclusively.

Why? Because glue-down systems allow you to easily replace one or ten tiles anywhere in the room if problems arise. With click flooring, you have to “chase the whole room” to access problem areas, and you’ll likely never get it to click back together properly after disassembly.

When professionals who make their living installing floors refuse to work with a product, that should give DIYers pause.

VISIT US TODAY

When Click Vinyl Works Well

Despite these concerns, click vinyl flooring does work successfully in many applications. The key factors for success include:

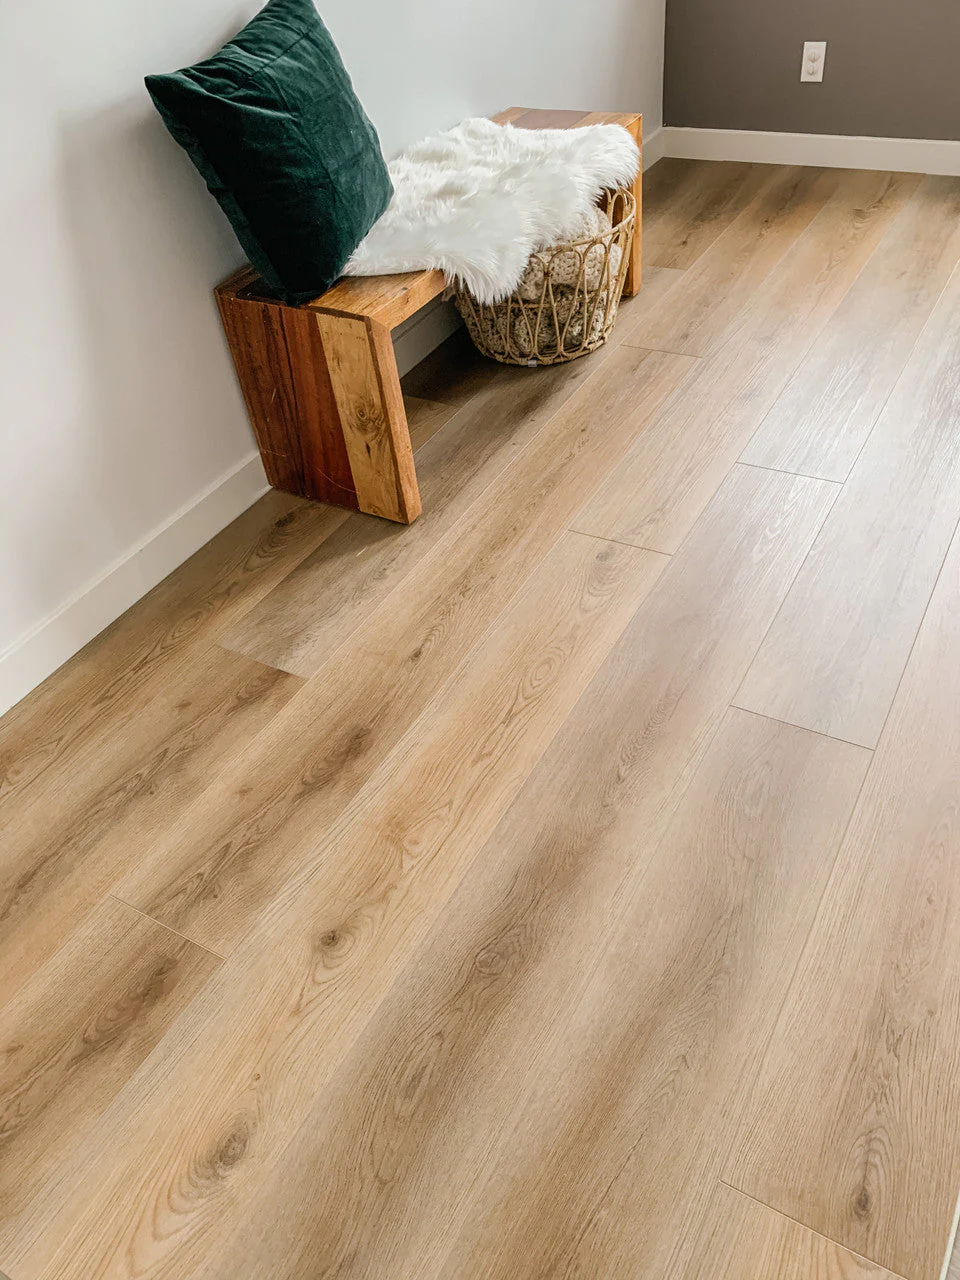
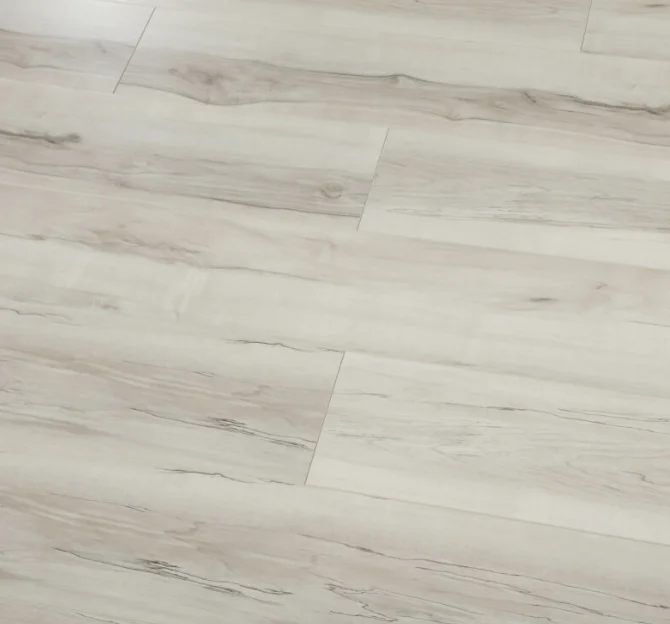
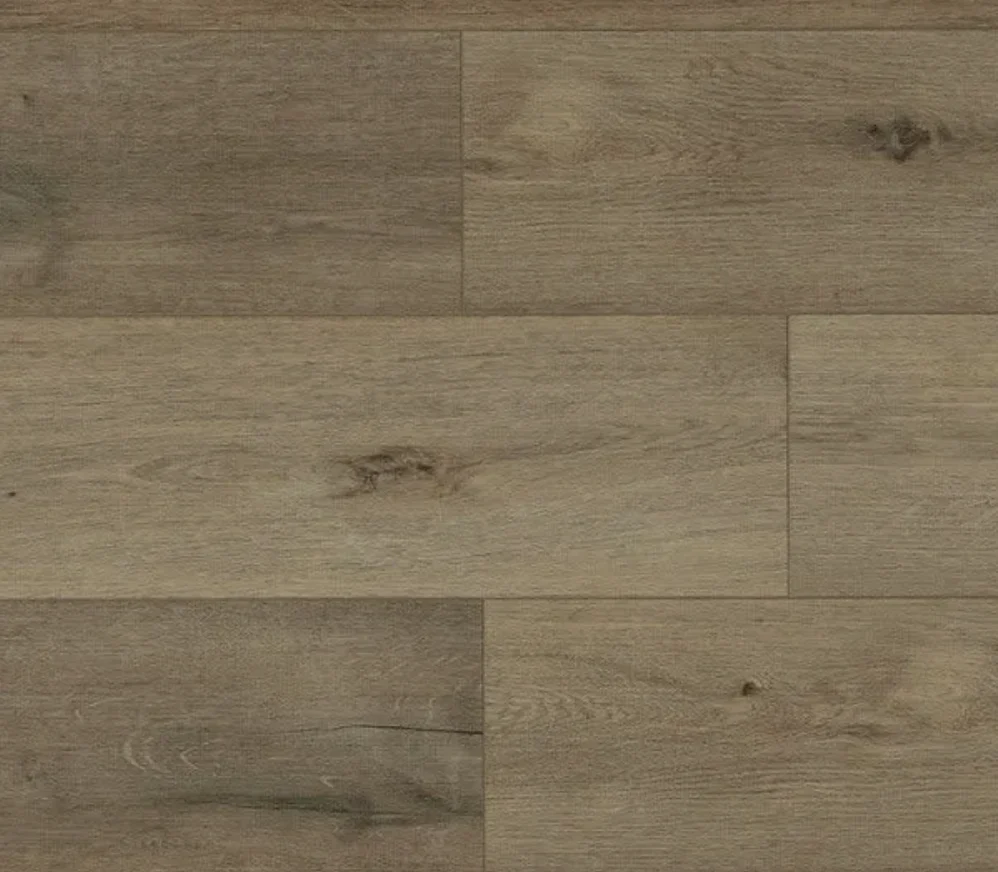
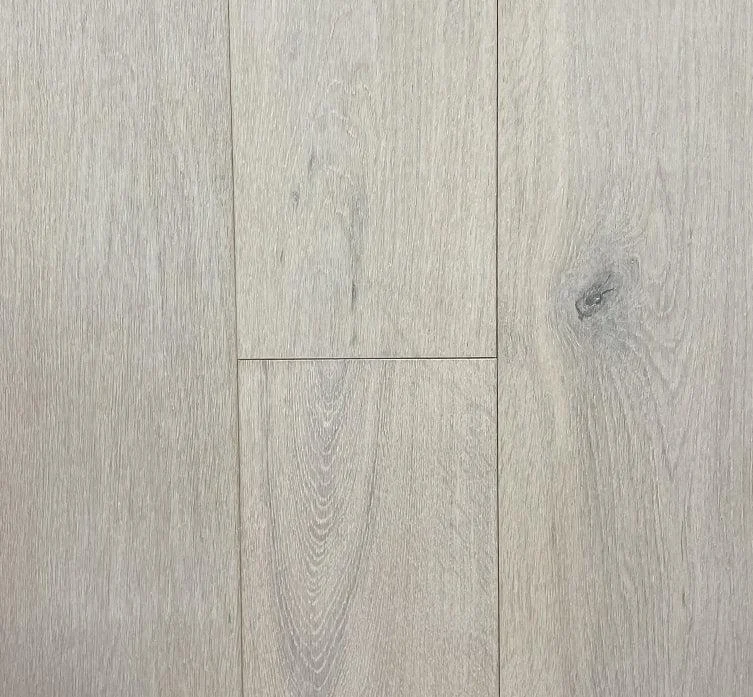
Quality Products: Premium click vinyl with rigid core construction, thick wear layers (20+ mil), and extensive pattern variations performs significantly better than budget options. One homeowner with high-quality click vinyl reported it still looked amazing after ten years.

Proper Subfloor Preparation: Success depends on having a perfectly level, clean, dry subfloor. The industry standard allows only 1/8 inch variation over 10 feet, but flatter is better. Multiple installers emphasized that applying self-leveling compound beforehand made all the difference.

Correct Installation Technique: This includes maintaining proper expansion gaps around all walls (typically 1/4 inch), using the recommended underlayment, floating skirting boards or quarter-round above the floor to allow movement, and following acclimation requirements so the flooring adjusts to your home’s temperature and humidity before installation.

Appropriate Applications: Click vinyl excels in rooms without underfloor heating, in moderate climates without extreme temperature swings, and in spaces where complete waterproofing is desired. Bedrooms, living rooms, and finished basements often prove ideal.

Realistic Expectations: Homeowners who understand they’re installing vinyl—not wood—tend to be more satisfied. If you’re comfortable with the material for what it is rather than expecting it to fool visitors into thinking it’s hardwood, you’ll likely be happy with the results.

Click Vinyl vs. Glue-Down: The Professional Perspective

The professional flooring community generally prefers glue-down vinyl for several compelling reasons:

Easier Repairs: Individual tiles can be cut out and replaced without disturbing surrounding flooring. This is particularly valuable in commercial settings or rental properties where damage repair is routine.

Superior Stability: Glued vinyl doesn’t expand, contract, or shift as a unit. Each tile stays exactly where it’s placed, eliminating gapping and buckling issues.

Installation Isn’t Actually Harder: Despite marketing claims, spreading adhesive with a trowel may actually be easier than fighting with click-lock mechanisms. One installer advised watching YouTube videos on glue-down installation, noting “it’s not rocket science” and often proves simpler than getting vinyl to click properly.

Compatibility with Underfloor Heating: Glue-down systems handle temperature variations much better since individual tiles can’t move independently.

The main disadvantage of glue-down vinyl? It’s truly permanent. If you later decide you hate it, removal requires significant effort and may damage the subfloor. You’re also committing to that flooring choice for the long term.

Installation Tips If You Decide to Proceed

If you’ve weighed the pros and cons and still want to install click vinyl flooring, these professional tips will help ensure success:

Before You Start

Level Everything: Use a 6 to 8-foot level to check your entire floor. High spots must be sanded down, low spots filled with leveling compound. This is non-negotiable—an uneven subfloor guarantees problems.

Use Proper Underlayment: Don’t skip the underlayment or assume the attached padding is sufficient. The recommended underlayment is typically only 2mm thick and comes on a roll. It must be laid out across the entire floor and joined with adhesive tape where pieces meet. This underlayment allows the floor to “float” and move slightly with temperature changes.

Acclimate the Flooring: Let your vinyl planks sit in the room where they’ll be installed for at least 48 hours. This allows them to adjust to the room’s temperature and humidity, reducing expansion/contraction issues after installation.

Plan Your Layout: Lay out rows completely before locking them down to ensure your last plank won’t be shorter than 8-10 inches. Do the same across the room’s width to avoid a final row less than 3-4 inches wide.
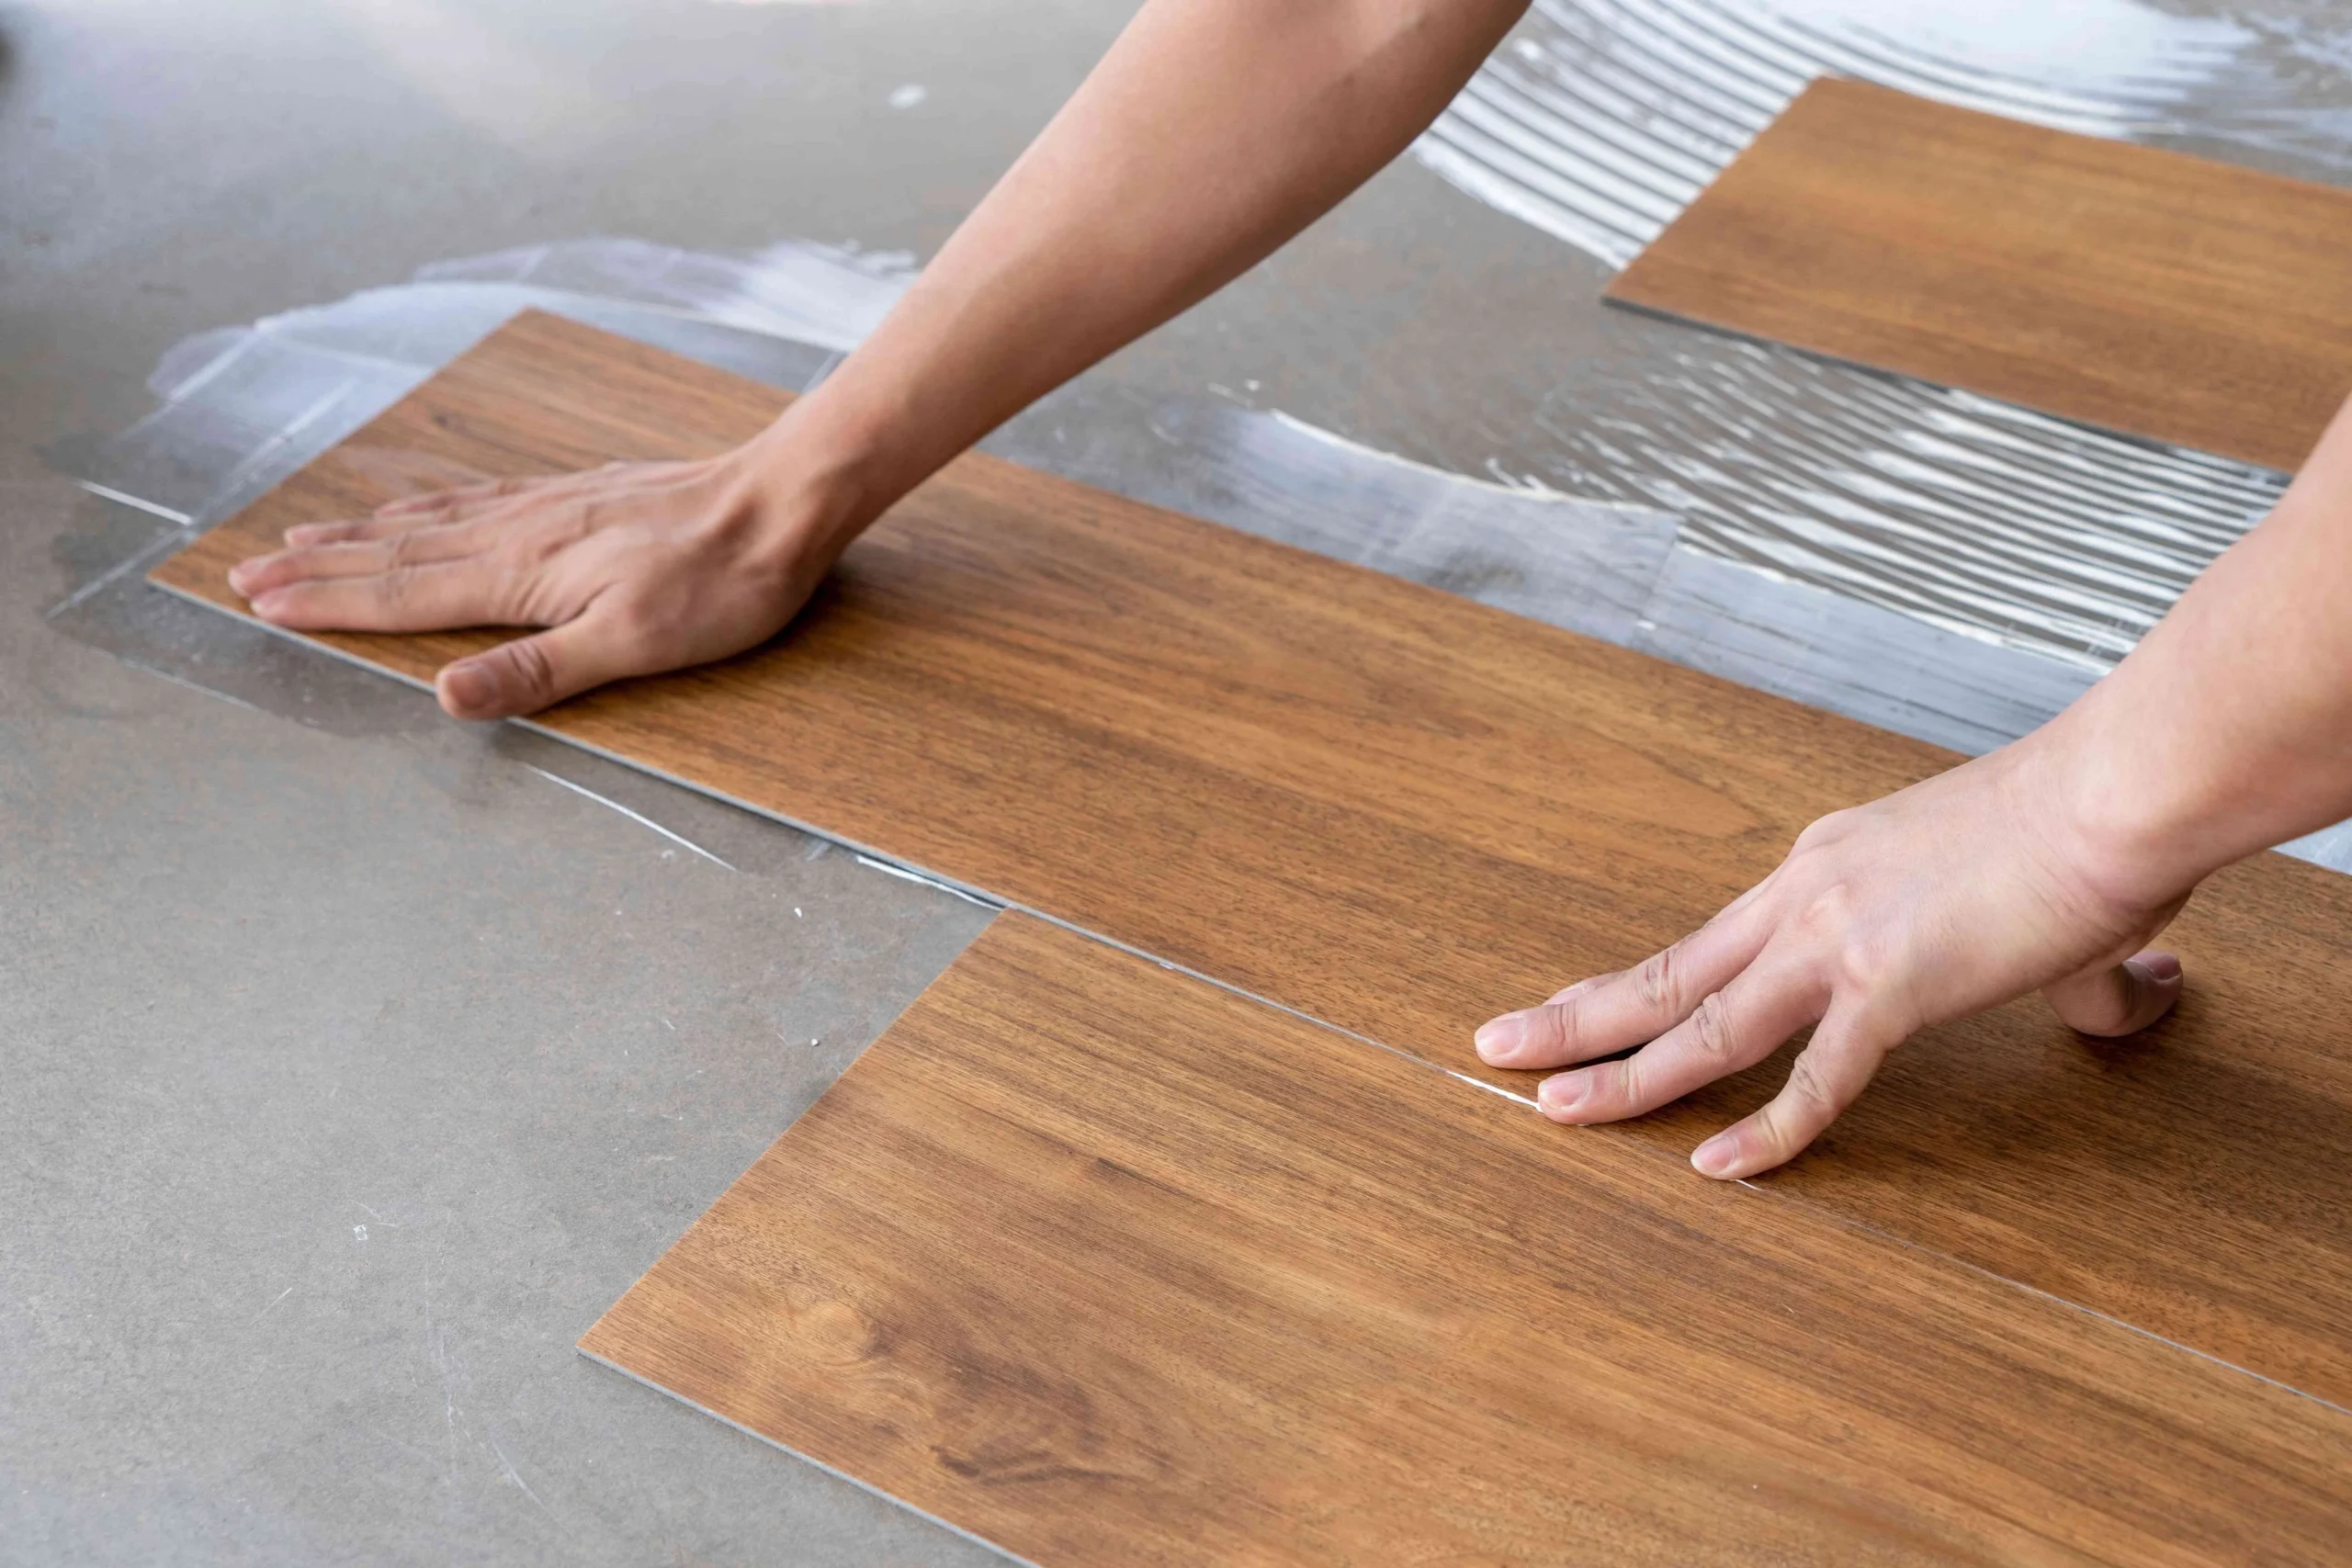
During Installation

Maintain Expansion Gaps: Leave 1/4 inch gaps around all walls, doorways, and fixed objects. Tape spacers to the walls rather than just setting them in place, as the floating floor can shift during installation and move spacers out of position.

Float Your Baseboards: Install baseboards or quarter-round molding above the floor rather than directly on it. This allows the floor to expand and contract beneath the trim without restriction.

Keep Everything Clean: Brush or vacuum the edges of every plank before joining them. Even a grain of sand can prevent proper locking and create gaps.

Apply Downward Pressure: When using a tapping block, always maintain downward pressure while striking it. The block tends to jump when hit, which can break the locking strip or damage the surface.

Watch for Stubborn Planks: Occasionally a plank simply won’t lock properly no matter what you do. Don’t force it—set it aside and try a different plank. The problematic piece will usually work fine elsewhere in the installation.

After Installation

Create Natural Breaks: Don’t try to make your entire house one continuous installation. Create transitions at hallway ends, doorways, and between major room changes. This allows each section to expand and contract independently.

Use Transition Strips: Cover breaks between flooring areas with appropriate transition strips—T-molding for same-height transitions, reducers for height changes, or thresholds at doorways.

Protect the Surface: Place felt pads under all furniture legs immediately. Even with thick wear layers, vinyl can scratch or dent under concentrated weight or dragging furniture.

The Longevity Question: How Long Does Click Vinyl Last?

Real-world experiences provide mixed results:

Success Stories:

  • One homeowner: six years with no problems
  • Another: still perfect after four years with thorough leveling beforehand
  • A third: amazing after ten years (higher-end product)
  • One more: five years of looking great

Problem Cases:

  • Gapping and swelling after months (professional installation)
  • Uneven surface after nine months (with underfloor heating)
  • Ridging and trenching visible within the first year

The pattern is clear: quality matters tremendously, installation technique is critical, and environmental factors (especially underfloor heating and temperature extremes) significantly impact longevity.

Even successful installations typically need replacement after 15-20 years, whereas ceramic tile can last 50+ years and hardwood can be refinished multiple times over decades.

When Ceramic Tile Makes More Sense

For homeowners concerned about longevity, appearance authenticity, or the potential problems with click vinyl, ceramic tile offers compelling advantages:

Genuine Durability: Properly installed ceramic tile lasts a lifetime. There’s no question of whether it will hold up—it will.

No Expansion Issues: Tile doesn’t expand and contract with temperature changes. Once grouted, it stays exactly where you placed it, with no gapping, buckling, or movement.

Authentic Appearance: Modern wood-look porcelain tile is remarkably realistic, and because each tile is genuinely unique (not a printed pattern), there’s zero pattern repetition even in large spaces.

Works with Radiant Heat: Tile is the ideal flooring for underfloor heating systems, efficiently conducting warmth without any movement or degradation.

Increases Home Value: Quality tile installations often add more to resale value than vinyl flooring. Buyers perceive it as a premium material.

Heat and Scratch Resistance: Unlike vinyl, tile won’t scratch from pet claws, dent from furniture, or sustain damage from hot items.

The tradeoffs? Tile costs more upfront, requires professional installation for most homeowners (though DIY is possible), feels cold and hard underfoot, and won’t provide the same cushioned comfort as vinyl.

Making Your Decision

Click vinyl flooring can be an excellent choice for budget-conscious homeowners who want a DIY-friendly, waterproof flooring solution and understand its limitations. It works particularly well in moderate climates, rooms without radiant heating, and when you select quality products from reputable manufacturers.

However, it’s not the miracle flooring solution that marketing materials suggest. The gapping, swelling, and longevity concerns are real, and professional installers’ reluctance to work with click systems should factor into your decision.

If you proceed with click vinyl:

  • Invest in quality products with rigid cores and thick wear layers
  • Prepare your subfloor meticulously
  • Follow installation instructions exactly, especially regarding expansion gaps
  • Avoid it entirely if you have underfloor heating
  • Set realistic expectations about appearance and longevity

If you’re looking for truly permanent, low-maintenance flooring that will look great decades from now, consider investing in ceramic or porcelain tile instead. The higher upfront cost pays dividends in durability, authentic appearance, and long-term value.


Need expert guidance on choosing the right flooring for your home? Visit Club Ceramic Cambridge to explore all your options, from luxury vinyl to premium ceramic and porcelain tile. Our team can assess your specific situation and recommend the best solution for your needs, budget, and lifestyle.

Special Considerations for Finished Basements

Many Ontario homes have partially or fully finished basements rather than traditional crawl spaces. These present unique ventilation challenges:

Subfloor Systems in Basements: If you’re finishing a basement, consider installing a raised subfloor system like DMX Airflow or similar products. These systems create an air gap between the concrete slab and your finished floor, providing:

  • Thermal insulation (warmer floors in winter)
  • Sound dampening
  • Drainage pathways if minor leaks occur
  • Vapor management

Several homeowners report that DMX Airflow with luxury vinyl tile (LVT) on top keeps their feet comfortable even during harsh Canadian winters. At most, the floor feels slightly cool, easily remedied with socks or area rugs.

Addressing Basement Moisture Before Finishing: Never finish a basement with active moisture problems. If you notice leaking, even minor puddles during extreme cold or spring melt, address the root cause first:

  1. Improve exterior grading and drainage
  2. Repair foundation cracks
  3. Install or repair weeping tile systems
  4. Consider a sump pump if water table issues exist
  5. Apply interior or exterior waterproofing as needed

One homeowner faced pressure to finish their basement immediately but wisely chose to spend one more winter monitoring moisture after making exterior improvements (extending eavestroughs, improving grading, adding drainage rock). This patience could save them from having to tear out carpet and replace flooring due to hidden water damage.

The Subfloor vs. Waterproofing Debate: A $1,700 raised subfloor system is not a solution for leaking basements. While it provides some protection (allowing water to drain rather than soaking into carpet), it’s a band-aid on a bigger problem. Fix leaks first, then add subfloor for comfort and performance benefits—not as a waterproofing measure.

DIY vs. Professional Assessment

Many ventilation improvements are DIY-friendly:

  • Removing landscaping blocking vents
  • Installing new foundation vents in existing openings
  • Setting up basic ventilation fans
  • Laying vapor barriers
  • Adding drainage rock and extending downspouts

However, consider professional help for:

  • Cutting new vent openings in masonry foundations
  • Diagnosing complex or persistent moisture issues
  • Electrical work for ventilation fans (if not using plug-in models)
  • Major grading or drainage system installation
  • Foundation crack repair or waterproofing

A qualified home inspector or foundation specialist can provide invaluable assessment, particularly if you’re dealing with ongoing moisture problems despite your best efforts.

Monitoring Your Results

After making ventilation improvements, monitor their effectiveness:

Install Humidity Sensors: Inexpensive smart humidity sensors (available for $20-40) placed in your crawl space provide real-time data on moisture levels. Ideal crawl space humidity should stay below 60%, preferably in the 40-50% range.

Visual Inspections: Check your crawl space or basement quarterly:

  • Spring: Look for moisture from snowmelt
  • Summer: Check for high humidity or condensation
  • Fall: Prepare for winter, ensure vents aren’t blocked by leaves
  • Winter: Monitor for ice buildup or condensation issues

Document Changes: Take photos before and after ventilation improvements. This documentation helps you assess effectiveness and provides valuable information if you need to consult with professionals later.

Long-Term Maintenance

Subfloor ventilation isn’t a set-it-and-forget-it solution:

  • Annually inspect and clean vents (remove debris, check screens for damage)
  • Monitor and adjust fan operation based on seasonal humidity changes
  • Maintain grading and drainage systems (restore soil slopes, clean gutters, extend downspouts)
  • Inspect vapor barriers for tears or displacement
  • Watch for new moisture sources (plumbing leaks, changed drainage patterns from neighborhood development)

Conclusion: Protecting Your Investment

Your home is likely your largest investment, and the foundation supporting it deserves attention. Proper subfloor ventilation protects structural integrity, maintains healthy indoor air quality, and prevents costly repairs down the road.

For Ontario homeowners, the combination of our challenging climate and aging housing stock makes ventilation vigilance particularly important. Whether you’re dealing with a historic home requiring vent upgrades, a new build where you want to ensure proper installation, or an existing home showing moisture warning signs, taking action now prevents problems later.

Start with assessment: check your current ventilation, look for moisture indicators, and evaluate your property’s drainage. Address grading and waterproofing issues first, then improve ventilation through better vents, additional openings, or mechanical fans as needed. Don’t forget vapor barriers—they’re often the single most effective moisture control measure.

With proper attention to subfloor ventilation, your Ontario home will maintain its structural integrity and comfort for decades to come.


Need expert advice on your specific situation? Contact Club Ceramic Cambridge for professional assessment and solutions tailored to your home’s unique needs. Our team understands Ontario’s climate challenges and can recommend the right approach for your property.